Welcome to the Sidekik class on Solidity programming. In this video and blog series, we aim to teach new developers how to code smart contracts – for free.
Setting Up Your Local Environment
In today’s post, we show you how to setup your Solidity Programming environment so that you have a solid foundation for Blockchain development.
Hardhat is for professionals
I recommend Hardhat for Solidity programmers who are serious about building smart contracts. Many tutorials recommend Remix, and that’s a great environment for tinkering. But if you talk to professional developers, you’ll see that they use either Hardhat or Foundry for real work.
Let’s start with a solid foundation as we dive into Solidity. You’ll need to spend 5-10 minutes setting up our Hardhat environment.
Installing Hardhat
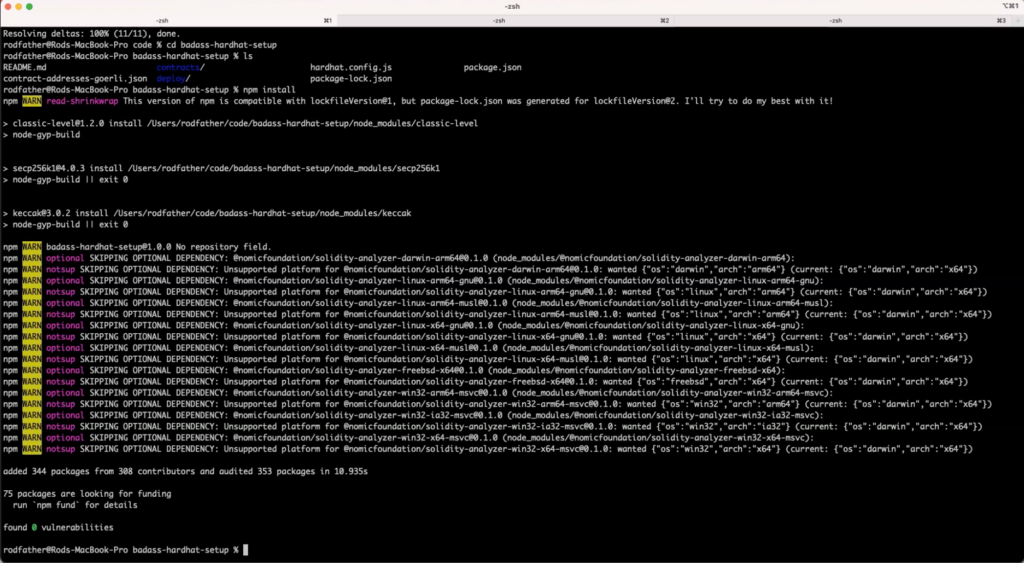
You can install Hardhat directly by running npm install --save-dev hardhat in your Terminal console. But I strongly recommend you accelerate your setup by cloning the Badass Hardhat Repo, created by Sidekik’s CTO. It’s pre-configured to help you go faster. For instance, it’s configured to auto-compile and deploy after each file change, and it writes your ABI and contract addresses to a JSON file for easy reference.
Open your terminal and run git clone [email protected]:mistersingh179/badass-hardhat-setup.git. Next, run npm install to download the necessary packages and dependencies.
Open your IDE of choice, (I like VScode, but you do you 😎) and explore the repo. You’ll notice a contracts folder with *.sol files and a deploy folder with *.js Javascript files.
Setup Local Environment Variables
This repo uses three environment variables to help accelerate your smart contract development process: a mnemonic, an Etherscan API key, and an Alchemy API key.
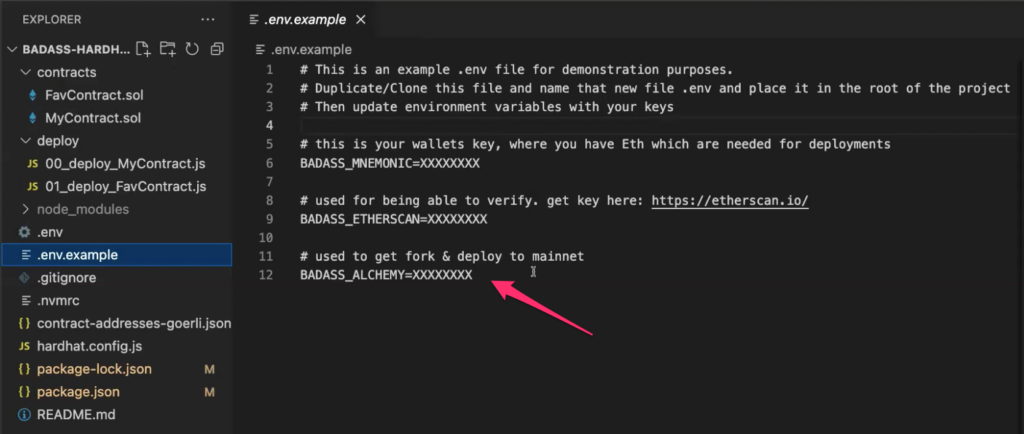
The mnemonic is “a 12 or 24 word mnemonic phrase as defined by BIP39.” It’s default value is “test test test test test test test test test test test junk”. Because we’re just developing in our local environment, this mnemonic will work. However, in a production environment, you would use your wallet’s 12 or 24 seed phrase (private key), which would be the source of gas to deploy a contract on a target blockchain.
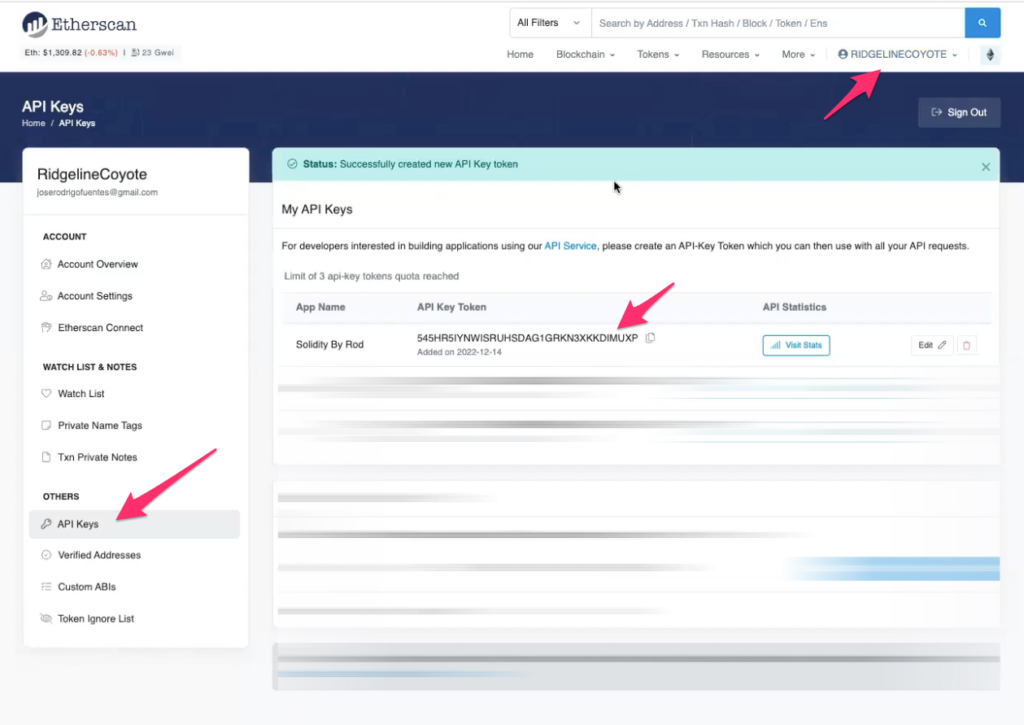
The second item you need is the Etherscan API key. This is free and easy to obtain. Navigate to Etherscan.io, create an account, and then visit the “API Keys” tab on the left-hand side. Create a new key and copy-paste that into your .env file. This API Key from Etherscan is useful to upload ABIs and verify contracts that you have deployed to a testnet or mainnet.
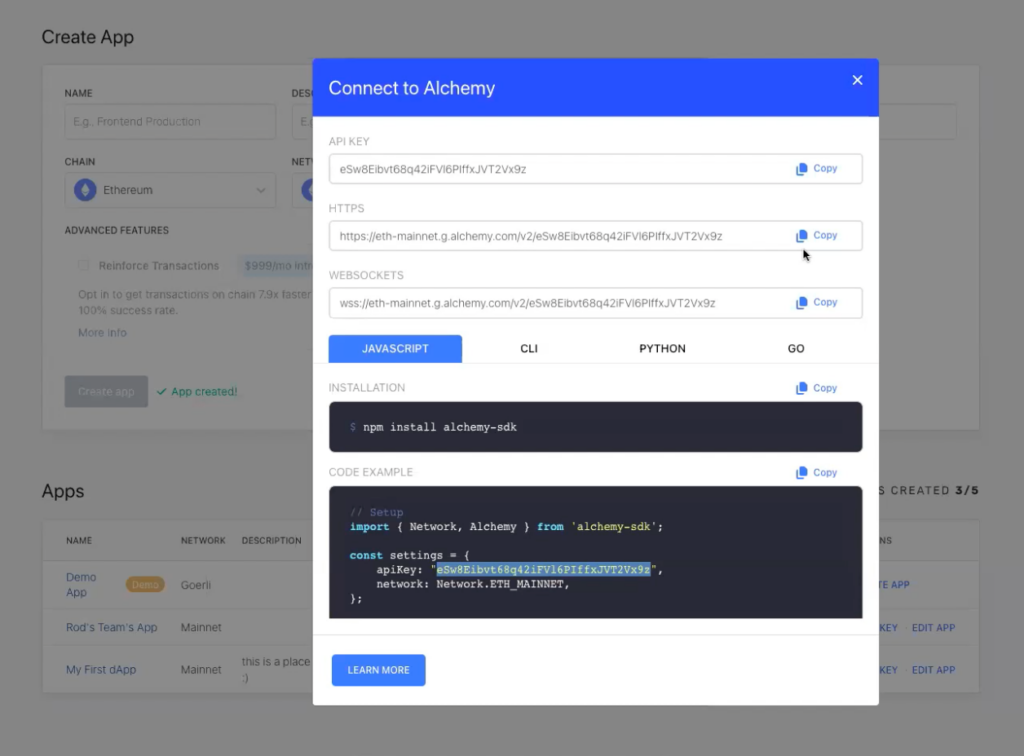
Finally, you’ll want to grab an Alchemy API key. Alchemy is a blockchain scaling platform that gives devs network connectivity and node management endpoints to certain blockchains. In the badass-hardhat-setup, Alchemy is used to create a fork of mainnet whenever you run a local chain. The advantage of this approach is that you bring in a snapshot of everything that’s on-chain at that moment so that your local environment can interact with external contracts (e.g., USDC, Uniswap Router, etc.).
Running a Local Blockchain
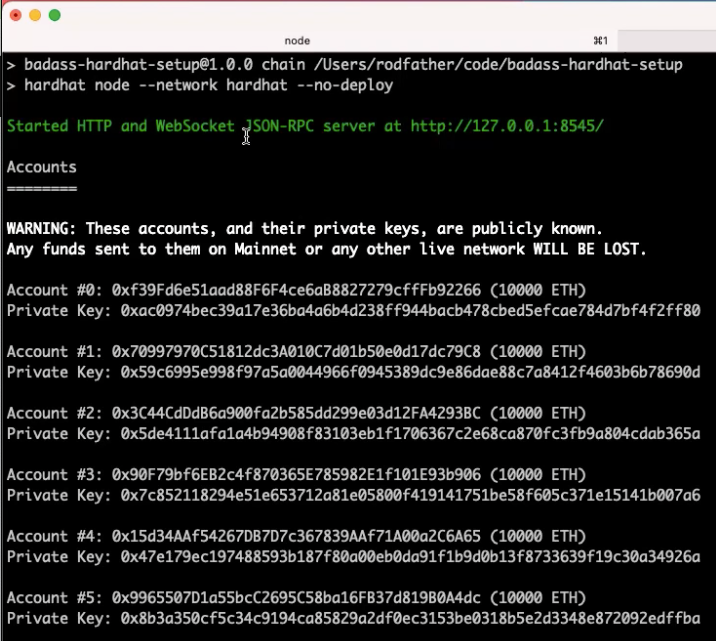
Much like running a local server to test and debug your code, Hardhat enables you to run a local copy of the blockchain. To do this, run npm run chain in your Terminal. The badass-hardhat-setup repo is configured to run the local chain and make it accessible via HTTP and Websocket JSON-RPC server at http://127.0.0.1:8545/.
Depending on your version of NPM, Node, and other factors, you may get an error about missing packages. If that happens, follow the instructions in the error message to resolve the missing dependencies:
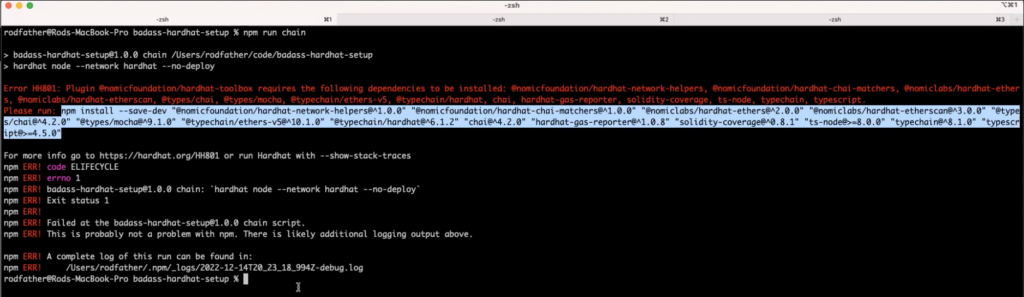
In the example above, I was missing various packages. I ran the following in Terminal:
npm install --save-dev "@nomicfoundation/hardhat-network-helpers@^1.0.0" "@nomicfoundation/hardhat-chai-matchers@^1.0.0" "@nomiclabs/hardhat-ethers@^2.0.0" "@nomiclabs/hardhat-etherscan@^3.0.0" "@types/chai@^4.2.0" "@types/mocha@^9.1.0" "@typechain/ethers-v5@^10.1.0" "@typechain/hardhat@^6.1.2" "chai@^4.2.0" "hardhat-gas-reporter@^1.0.8" "solidity-coverage@^0.8.1" "ts-node@>=8.0.0" "typechain@^8.1.0" "typescript@>=4.5.0"
and that resolved the issue for me. Don’t just copy-paste the above; look at the specific error message if you run into this issue.
Compiling & Deploying your Smart Contracts
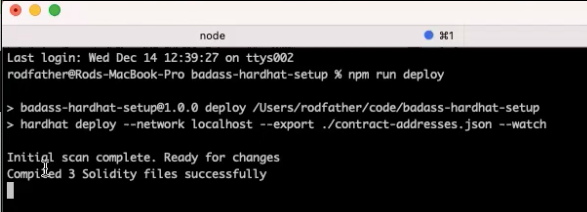
After your local chain is running, you’ll compile and deploy your contracts to that chain. Execute npm run deploy in your Terminal:
Congrats, you just setup your Hardhat environment, ran a local chain, and deployed your smart contract to it. Now how do you see the fruits of your labor? Simple: connect Sidekik to your environment to easily interact with your code and check that it works as intended.
Use Sidekik to Interact with your smart contract
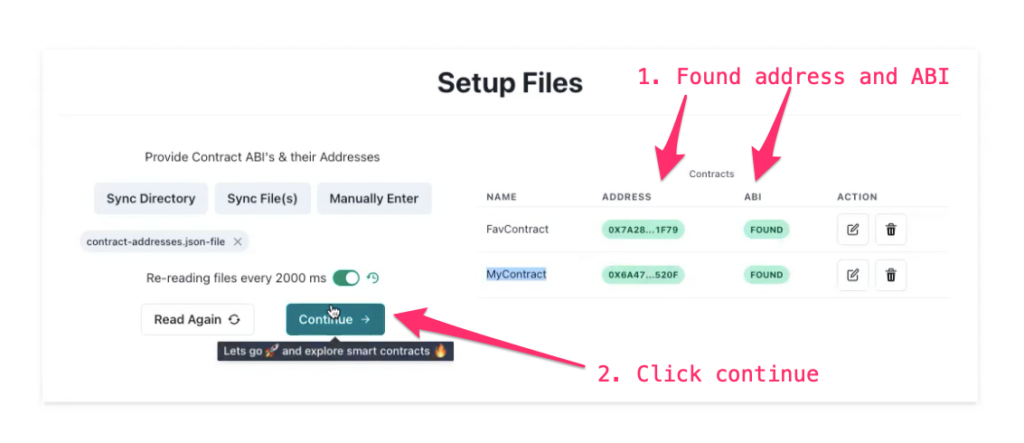
Navigate to the client-side web application at https://app.brandweaver.ai/. First, verify that your local chain is running and connected. Second, click on Sync File(s) and select the JSON file that contains your ABI and deployed contract address. (If you’re using the badass-hardhat-setup repo, then you’re already outputting your ABI and deployed contract address to a JSON file, contract-addresses.json-file 🎉 If you’re not using our recommended repo, here’s documentation on how to write the ABI and address to a JSON file.) You’ll know that Sidekik is ready when it shows your deployed contracts (FavContract and MyContract), their addresses, and ABIs:
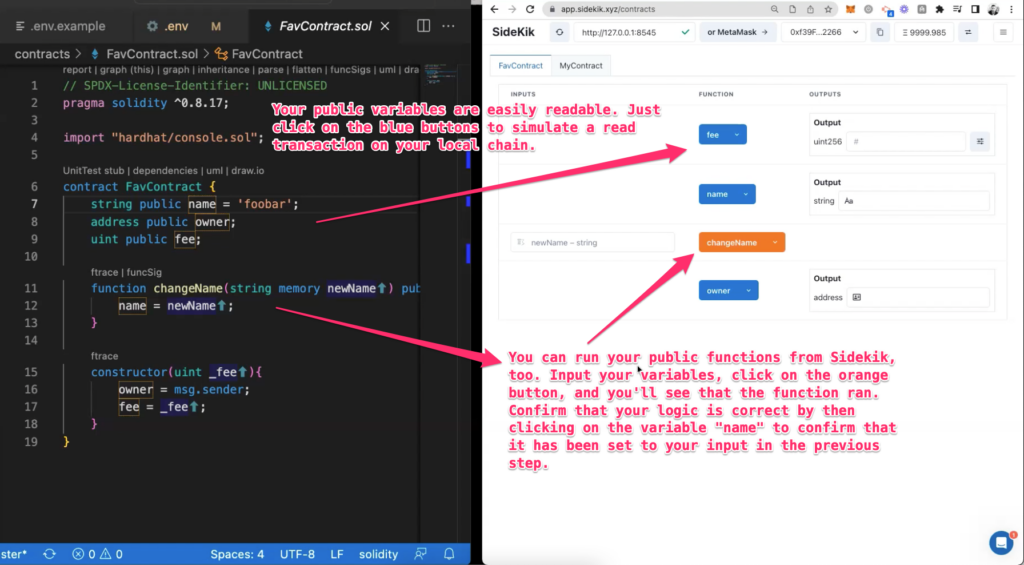
After you click Continue, Sidekik gives you a visual way to interact with your smart contract. For instance, your public variables are readable by clicking on the blue buttons, which simulates a read transaction on your local chain. You can also run public functions. Just input your variables, click on the orange button, and you’ll see that function’s output.
As an example, confirm that your smart contract logic is correct by clicking on the variable name after running your changeName function to demonstrate that your code changed the name variable from “foobar” to your input.
Again, congratulations on completing this first step on your journey into the Solidity programming language. We look forward to hearing from you on Twitter, Discord, or in the comments below!