In this post, we create a simple “hello world” smart contract, compile it, and deploy it to your local chain. We also cover basics, such as declaring a license type, pragma solidity version numbers, and declaring a public variable. We hope you enjoy it!
The Simplest Smart Contract
Let’s write the simplest smart contract: Hello World 👋 🌎 First, create a new Solidity file called, HelloWorld.sol. I did this by simply copy-pasting an existing .sol file, but you can always start from scratch if you prefer.
Name the contract, HelloWorld

We’ll write the Solidity code in between the curly braces (starting at line 7, above). But first, let’s briefly describe what’s going on in lines 1-2.
License Declaration
The first line is a license declaration. Your code will compile without a license declaration, but if you don’t put a license, the compiler will emit warnings. I don’t like warnings, so let’s add either UNLICENSED or MIT (a permissive, open-source license).
Solidity Compiler Version Declaration
In line 2, we specify the compiler version. I set it to Solidity ^0.8.17. If you want to target a compiler version that is greater than or equal to 0.8.17, you include a carrot ^, which tells the Solidity compiler that this contract is meant for compiler greater than or equal to 0.8.17. It is considered good practice to set the compiler version to a specific number, especially when deploying to mainnet so that future versions (which may include breaking changes) don’t wreck your code.
Adding a String to your smart contract
In line 6, contract HelloWorld{} is the simplest Solidity contract there is. But it’s rather uninspiring because it does nothing at all. So let’s spice things up 🌶
To add a string inside this smart contract, at line 7, type:
string public someString = "Hello World!";
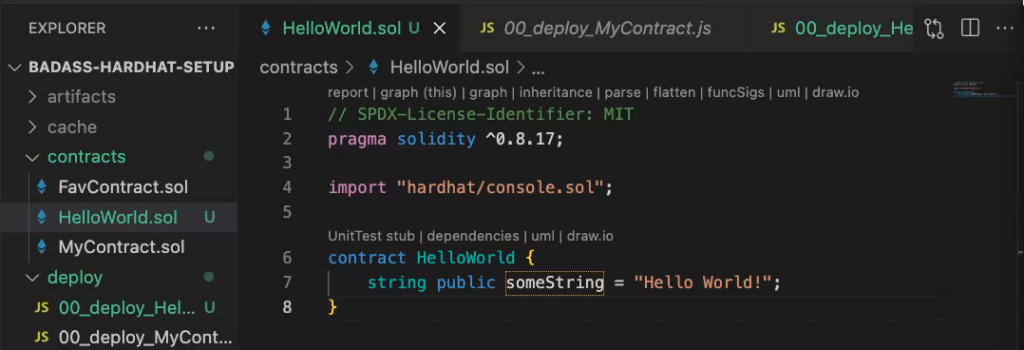
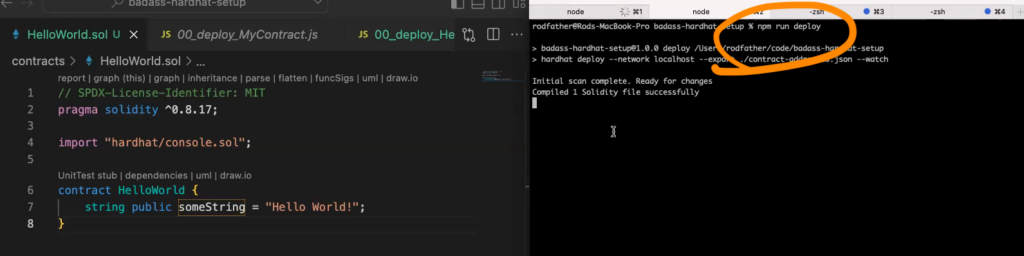
The string public declaration means that anyone can read the SomeString variable after we deploy the smart contract on chain. The second part sets the variable someString to “Hello World!” Now compile this contract and deploy it via Terminal by executing npm run deploy:
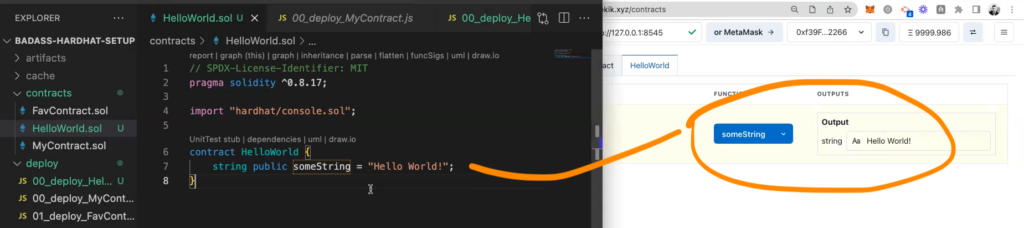
Finally, test that the smart contract does what you expect. Load the contract in Sidekik and verify that you can read someString. Do that by clicking on the blue button, someString. Sidekik should return the output value, “Hello world!”
Congrats on completing another step in your Solidity programming language journey. Stay tuned for the next post, where we demonstrate how to build a simple counter. There, we’ll introduce the concept of read and write functions.